Sourdough bread, with its tangy flavor and chewy texture, has gained widespread popularity for both its taste and its health benefits. However, the idea of making sourdough from scratch can be intimidating for beginners. Fear not! With a bit of patience and practice, you can master the art of sourdough baking. Here are three essential tips to get you started on your sourdough baking journey.
1. Cultivating Your Sourdough Starter
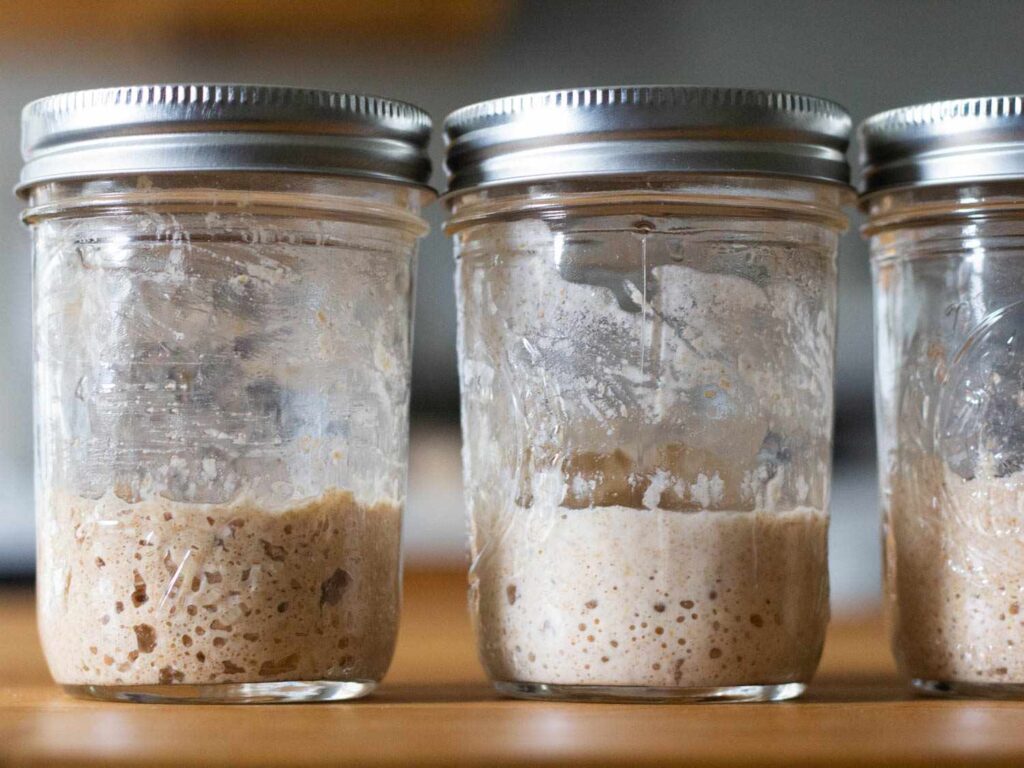
The foundation of every great sourdough loaf is a healthy sourdough starter. A starter is simply a mixture of flour and water that captures wild yeast and bacteria from the environment, which will naturally leaven your dough. To make your own starter, you’ll need:
- Flour – You can use all-purpose flour to start, but whole wheat flour or rye flour are often recommended because they contain more nutrients that help foster yeast growth.
- Water – Use filtered or non-chlorinated water, as chlorine can inhibit the growth of the yeast and bacteria.
Here’s how to create your starter:
- Day 1: Mix 100 grams of flour and 100 grams of water in a jar. Stir well, cover loosely with a lid or cloth, and let it sit at room temperature for 24 hours.
- Day 2-5: Continue feeding the starter every 24 hours by discarding half and adding 100 grams of flour and 100 grams of water. Over the next few days, you’ll begin to see bubbles form, and the starter will start to smell slightly sour.
- Day 5 or Later: When your starter has doubled in size within 4-6 hours of feeding and is full of bubbles, it’s ready for baking. If you don’t need it immediately, you can store it in the fridge and feed it once a week.
The key to a strong starter is consistency. Don’t rush it! You may need up to five days or longer to develop a vibrant, active starter.
2. Understanding Autolyse and Hydration
Once you have an active starter, the next step is mixing your dough. Sourdough is known for its high hydration, which creates a lighter, more open crumb. However, beginners can be intimidated by wetter dough, so it’s helpful to understand the process of autolyse—a technique where flour and water are mixed and allowed to rest before adding salt and starter.
Autolyse helps to improve the dough’s texture and makes it easier to knead. Here’s how to use this method:
- Mix the Flour and Water: Combine your flour (typically a mix of white and whole wheat) and water. Let it sit for about 30 minutes to 1 hour before adding your starter and salt.
- Add Starter and Salt: After the autolyse period, add your starter (usually about 20% of the dough weight) and salt. Knead gently, adding a little extra water if needed.
- Hydration: Aim for a dough that is sticky but manageable. If you’re a beginner, consider starting with a dough that’s 70% hydration (for example, 700 grams of water for every 1 kg of flour). You can increase the hydration as you get more comfortable with handling sourdough.
Autolyse will improve gluten development and help your dough rise more effectively, even without the use of mechanical mixers.

3. Shaping, Proofing, and Baking
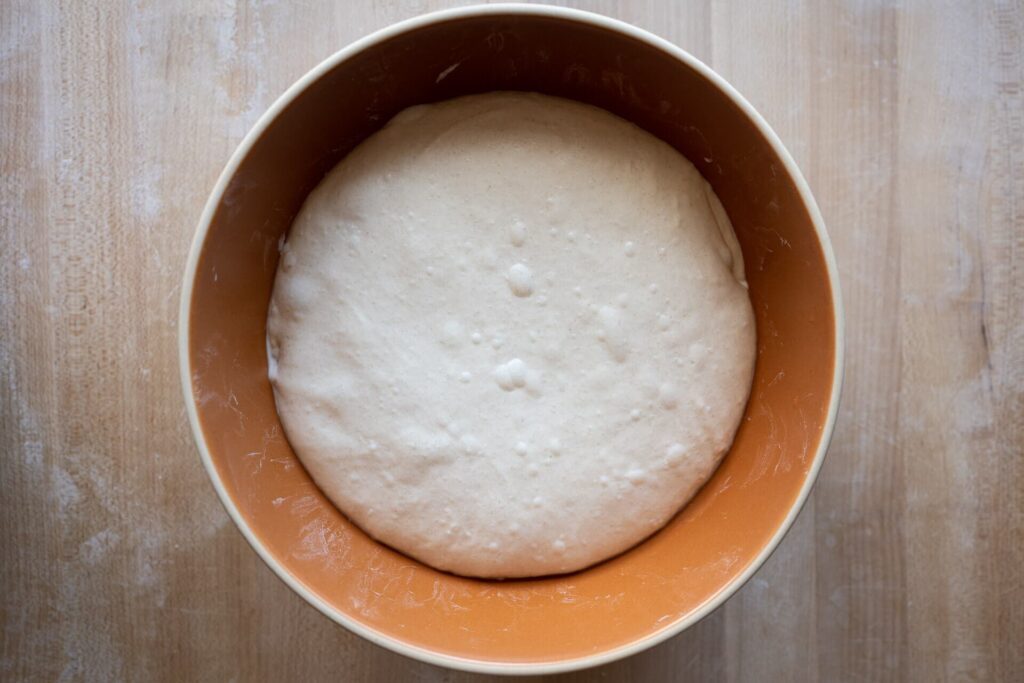
Once your dough has been mixed and kneaded, it’s time to shape and proof it. The proofing process is when the dough ferments and rises, and it is critical for developing flavor and texture. Here’s how to shape and proof your dough:
- First Proof: Allow the dough to rise at room temperature for 3-4 hours (or overnight in the fridge if you prefer a slower fermentation).
- Shaping: After the first proof, gently turn the dough out onto a floured surface and shape it into a round or oval shape, depending on your baking vessel (such as a Dutch oven or baking stone).
- Second Proof: Let the dough rest for another 2-3 hours at room temperature, or place it in the fridge for an overnight proof if you want a more developed flavor.
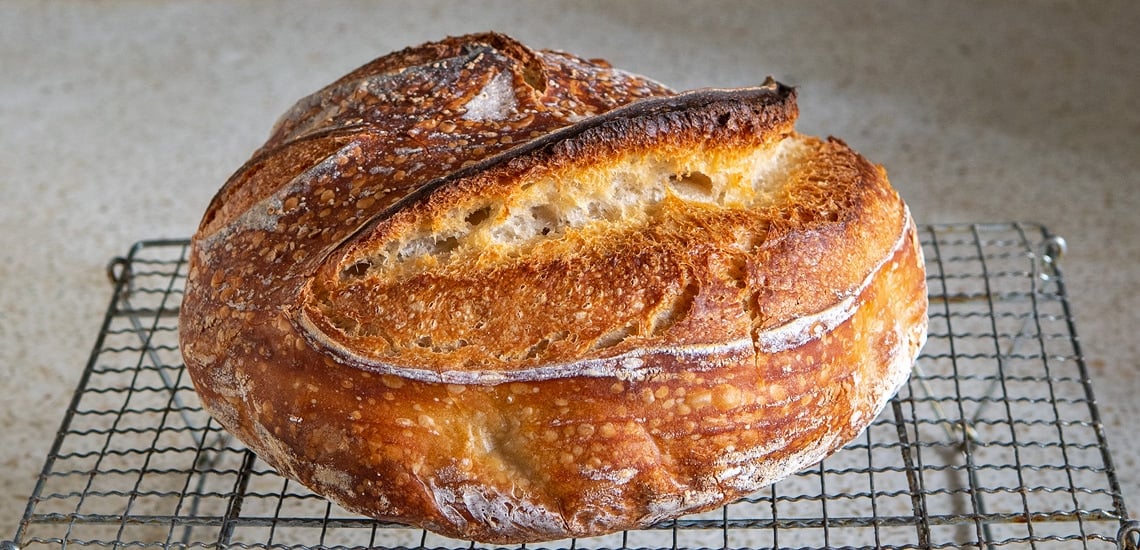
- Baking: Preheat your oven to 450°F (232°C). If using a Dutch oven, place the dough inside and cover it with the lid. Bake for 20 minutes, then remove the lid and bake for another 20-30 minutes until the bread is golden brown and sounds hollow when tapped on the bottom.
As a beginner, it may take a few tries to perfect your sourdough technique, but don’t be discouraged! The more you practice, the better your results will be. The key to successful sourdough baking lies in patience, understanding the fermentation process, and paying attention to the details of each step.